

Kitchen Design Ideas for a Beautiful and Functional Space
Kitchen design is the art of planning a space so that every cabinet, counter, and appliance sits exactly where you need it, turning daily cooking and gathering into effortless flow. It works by balancing your habits—like whether you brew coffee first thing or host big dinners—with smart zones for prepping, cooking, and cleaning, so you’re never crossing the room just to grab a spoon. The payoff is a room that feels bigger, saves you time, and actually makes you want to cook, since a well-planned layout reduces wasted motion. Start by sketching your current routine, then map out a triangle between sink, stove, and fridge to see where the magic happens.
What Makes a Kitchen Layout Feel Effortlessly Functional?
An effortlessly functional kitchen layout hinges on the unbroken work triangle—a tight, unobstructed flow between sink, stove, and refrigerator. When these zones sit within a few steps of each other, every meal prep motion becomes instinctive, eliminating wasted strides and awkward cross-traffic. Countertops must flank each appliance with dedicated landing space, so hot pots and fresh groceries always have a resting spot. Critical, too, is the placement of the dishwasher beside the sink for direct unloading, while trash and recycling should hide within a pull-out near the prep zone to shorten the discard path.
True ease emerges when storage mirrors use: pots near the range, utensils by the cutting board, and everyday dishes at hip height.
Finally, keep major aisles at least 42 inches wide so two cooks can pass without a pause, and let symmetry of open floor space prevent any sense of crowding.

Mapping the Work Triangle for Smooth Daily Flow
The work triangle’s mapping hinges on placing the sink, cooktop, and refrigerator as points of a compact, unobstructed triangle, with each leg measuring between four and nine feet. For smooth daily flow, position the sink at the triangle’s apex, centered between the refrigerator and cooktop, since washing and prep generate the most cross-traffic. Avoid placing any leg through a main walkway or island, as this breaks the continuous path during multi-step tasks like retrieving ingredients, chopping, and sautéing. Keep the triangle free of tall cabinets or peninsulas that force detours, and ensure appliance doors don’t collide when opened simultaneously. This precise geometry minimizes redundant steps, letting you pivot naturally between cleaning, prepping, and cooking without bottlenecks.
Clear Zones for Cooking, Cleaning, and Storage
An effortlessly functional kitchen relies on distinct clear zones for cooking, cleaning, and storage, each with dedicated space to prevent cross-traffic and clutter. The cooking zone demands a clear, heat-proof landing area beside the hob for hot pans, while the cleaning zone needs an unobstructed radius around the sink for air-drying dishes and food prep. Storage zones should sit within arm’s reach of their related task—pots near the stove and utensils near the counter—to minimize steps. Keeping these zones physically separated, with no overlapping traffic paths, ensures clear zones for cooking, cleaning, and storage remain practical and safe.
Q: What is the minimum width for a clear zone?
A: Aim for at least 40 centimeters of open counter space directly adjacent to each of the three zones to allow comfortable, uninterrupted movement.
Traffic Patterns That Avoid Bottlenecks and Blind Spots
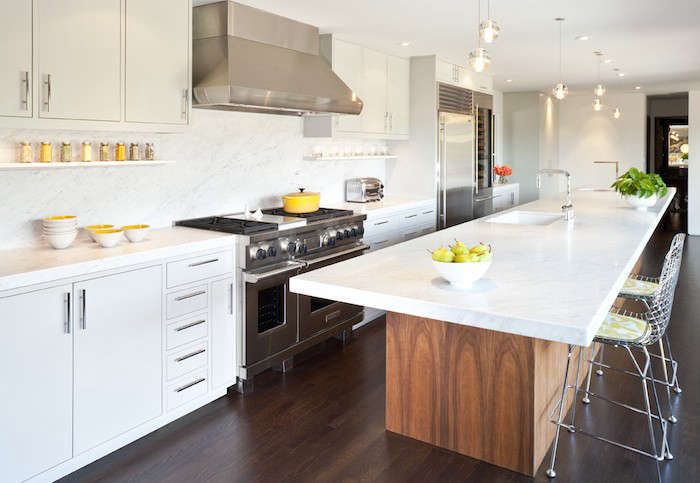
An effortless kitchen hinges on clear traffic lanes that prevent congestion, not just stylish layouts. Position the sink, stove, and refrigerator as a tight triangle, but ensure a minimum of 42 inches of walkway between counters so two people pass without shuffling. Avoid placing the dishwasher directly in front of the oven, and never put the refrigerator door where it blocks the primary work zone when opened. Create a dedicated landing spot beside every appliance, eliminating the blind spot where hot pots or groceries awkwardly hover. Islands should never sit in the main path; instead, they must channel foot traffic toward the edges, making every move predictable and collision-free.
How Do You Choose the Right Cabinet Styles and Finishes?
Choosing the right cabinet styles and finishes for your kitchen design begins with assessing your home’s architectural character and your functional needs. For a cohesive look, match the door profile to the room’s formality—shaker doors suit transitional spaces, while flat-panel or slab doors create a modern, minimalist aesthetic. The finish sets the mood: high-gloss lacquer reflects light for small kitchens, whereas matte or wood-grain finishes hide fingerprints and add warmth. Consider durability in high-traffic areas; thermofoil and laminate are cost-effective and easy to clean, but solid wood offers timeless appeal and can be refinished. Ultimately, your choice of cabinet style should harmonize with countertop and backsplash materials, and your finish should balance your maintenance tolerance with your desired visual weight. Test sample doors under your kitchen’s actual lighting to ensure the color appears as intended before committing.
Balancing Open Shelving Against Closed Storage
Balancing open shelving against closed storage requires a deliberate ratio, not an all-or-nothing choice. Reserve open shelving for daily-use items and curated displays, such as glassware, ceramics, or spices, where visibility reduces search time and adds tactile warmth. Closed cabinets should house bulky appliances, plastics, and pantry overflow to maintain a streamlined silhouette and protect against dust and grease. A practical rule is the 20/80 split: twenty percent open display against eighty percent closed concealment, preventing visual clutter while retaining practicality. Place open units on a feature wall away from the cooktop to minimize airborne residue, and ensure closed storage handles match the open shelving’s material finish for cohesion.
| Aspect | Open Shelving | Closed Storage |
|---|---|---|
| Best for | Everyday dishware, decor | Appliances, dry goods |
| Maintenance | Weekly dusting required | Minimal upkeep |
| Visual impact | Airy but can feel busy | Clean, uniform facade |
| Cost | Lower upfront | Higher due to doors/hinges |
Selecting Durable Materials That Match Your Cooking Habits
Selecting durable materials that match your cooking habits begins with an honest assessment of your daily kitchen activity. If you sear frequently or simmer for hours, consider thermally fused laminate or thermofoil for cabinet exteriors, as these resist moisture and grease vapor better than raw wood. For high-traffic prep zones, opt for acrylic or polyester finishes over painted surfaces, which chip easily under dropped cast iron. Conversely, if you bake rarely and favor quick meals, natural wood with a matte sealant offers adequate durability while adding warmth. Always prioritize scratch-resistant interiors; soft-close plywood boxes withstand repeated pot banging better than particleboard. Ultimately, aligning cabinet surfaces with your cooking intensity prevents premature wear and simplifies cleanup, whether you boil pasta nightly or host occasional roasts.
Hardware and Pulls That Improve Grip and Ergonomics
When selecting cabinet hardware, prioritize ergonomic pulls that reduce hand strain during daily kitchen tasks. Choose bar pulls or curved handles with a finger gap, allowing a natural grip without wrist twisting. Opt for matte or textured finishes over high-gloss, which become slippery when hands are wet or greasy. Look for pulls with a diameter or thickness that fits your hand comfortably—too thin digs in, too thick forces a clumsy pinch. For drawers, angled or D-shaped handles let you hook fingers fully, distributing weight evenly. Avoid small knobs on heavy drawers; they concentrate force on fingertips and cause fatigue.
- Test the pull’s clearance: ensure knuckles don’t hit the cabinet face when grabbing.
- Choose lever-style handles for tall upper cabinets—they allow a push-down motion using the palm.
- Select pulls with a rounded backplate to spread pressure across the hand, not just the fingertips.
Which Countertop Options Offer the Best Real-World Performance?
For real-world kitchen design, best countertop performance balances durability with everyday maintenance. Quartz wins for busy families because it’s non-porous, so wine and oil won’t stain, and you never need sealing—just wipe with soap and water. But avoid placing hot pans directly on it; the resin can scorch. Natural granite offers classic appeal and handles heat beautifully, but its porous surface demands periodic sealing to repel bacteria and dark liquids like coffee. If you’re a serious baker, stainless steel resists heat and sanitizes easily, though it scratches and shows smudges. Butcher block is forgiving on knives and feels warm, yet it requires regular oiling and will water-stain near sinks. Ultimately, quartz offers the best overall real-world performance for low-maintenance, high-traffic kitchens, provided you respect its heat limits.
Heat, Scratch, and Stain Resistance Compared by Daily Use
In daily kitchen use, heat, scratch, and stain resistance compared by daily use reveals stark real-world trade-offs. Quartz laughs off red wine and olive oil, but a forgotten hot skillet can leave a permanent white burn mark. Butcher block scratches from knife work, yet those cuts vanish with sanding—stains, however, demand immediate wiping. Porcelain slab endures searing pans and dagger-sharp edges, though acidic spills might etch its glossy face. Laminate resists heat briefly but melts under a slow simmer; its scratched surface traps tomato paste forever. Solid surface is the weakest link: hot pots dent it, abrasive pads dull it, and turmeric stains linger unless bleached on the spot.
- Granite handles boiling pots, but porous spots need sealing to block oil stains.
- Stainless steel resists heat and scratches, yet shows every water mark unless brushed.
- Soapstone withstands heat but scratches easily—mineral oil masks the scuffs.
- Sintered stone wins on all three counts, though sharp edges can chip.
Seamless vs. Segmented Surfaces for Prep and Cleanup
For prep and cleanup, seamless surfaces—like solid-surface, quartz, or large-format porcelain slabs—outperform segmented counterparts because they eliminate grout lines and joints where bacteria, moisture, and food debris accumulate. A continuous sweep allows direct kneading, rolling, and scraping without interruption, and cleanup becomes a single wipe from edge to edge. Segmented surfaces, such as tile or butcher-block sections, create physical ridges that snag utensils, trap crumbs, and require meticulous brushing of every crevice. Additionally, seamless installations avoid differential settling or lippage that can create uneven prep zones. While segmented designs offer visual rhythm, they demand perimeter sealing and frequent re-grouting, adding maintenance time. For high-frequency cooking, prioritize uninterrupted stretches near the sink and main prep zone.

Seamless surfaces streamline prep and cleanup by removing joints and crevices, while segmented surfaces introduce hidden catch-points that slow workflow and demand extra scrubbing.
Matching Edge Profiles and Thickness to Your Aesthetic

While performance often hinges on material composition, matching edge profiles and thickness to your aesthetic directly influences both durability perception and daily usability. A thick, square edge (2–3 cm) communicates heft and suits modern, minimalist kitchens, but it can feel bulky against delicate cabinetry; conversely, a thinner profile (1.2 cm) with a bevel or eased edge reads as sleek and contemporary, yet may appear fragile under heavy use. For high-traffic zones, a rounded or bullnose edge reduces chipping risk at vulnerable corners, whereas a sharp, mitered edge demands precise fabrication and offers zero tolerance for installation errors. Your choice of edge profile should also complement the countertop’s visual weight—a waterfall or full-height slab benefits from a seamless, eased edge, while a laminated or overlay look pairs better with an ogee or demi-bullnose. Ultimately, thickness affects both overhang support and how the countertop visually anchors your island or perimeter, so align these details with your cabinetry style and lighting to achieve a cohesive, intentional finish.
What Lighting Strategy Transforms a Kitchen From Dim to Inviting?
The real trick to a welcoming kitchen isn’t one overhead light—it’s layered lighting. Start by swapping that single, harsh ceiling fixture for a dimmable ambient light, like recessed cans or a stylish pendant, to set a soft base glow. Then, add task lighting under the upper cabinets to banish counter shadows and make prep areas feel bright and focused. Finally, the inviting factor comes from accent lighting: a low-voltage strip under the toe-kick or inside glass-front cabinets adds depth and warmth after dark. To truly transform the mood, use separate switches or smart dimmers for each layer, so you can dial down to a cozy, romantic vibe or crank up for serious cooking—never relying on one stark, flat light.
Layering Ambient, Task, and Accent Light for Every Corner
To banish shadows from every corner, start with ambient light—recessed ceiling fixtures or a flush-mount fixture—to establish a soft, overall glow. Then, layer task lighting directly where you chop, cook, and rinse, using under-cabinet LED strips or pendant lights over the island to eliminate workspace shadows. Finally, add accent lighting inside glass-front cabinets, along open shelving, or beneath a toe-kick to highlight textures and create depth. Layering ambient, task, and accent light ensures no corner feels forgotten, but the secret is controlling each layer on a separate dimmer switch, so you can shift the mood from bright prep to intimate dining instantly.
Q: What is the simplest way to start layering light in a dark corner?
A: Install a low-profile LED strip under the upper cabinet nearest that corner—it instantly adds focused task light while bouncing a soft glow onto the backsplash, making the area feel larger and more welcoming.
Under-Cabinet Illumination for Precision Chopping and Reading
Under-cabinet illumination directly addresses the failure point where overhead fixtures cast your own shadow onto the cutting board. For precision chopping, a focused task-light placement near homebrella.com the front edge of the counter eliminates this occlusion, revealing ingredient texture and knife alignment with consistent, shadow-free intensity. When reading recipes from a tablet or open book, the same fixture’s directional beam reduces glare by keeping light off glossy screens while illuminating the page itself. Choose a correlated color temperature near 4000K for neutral contrast; warmer tones distort raw meat hues, cooler ones strain the eyes during extended prep. Mounting depth matters—too shallow creates a hot spot, too deep defeats the purpose.
Pendant and Recessed Placement That Eliminates Shadows
To truly banish shadows, combine pendant and recessed placement so they work as a team, not separately. Hang pendants low over islands—about 30 inches above the counter—angled to cast light straight down onto prep zones. Then, inset recessed cans around the room’s perimeter, aiming them at cabinets and corners where pendants can’t reach. The trick is overlapping beams: space recessed lights 4 to 5 feet apart, and offset them from pendant positions so their pools of light merge. This layered approach eliminates dark pockets under upper cabinets and beside range hoods, creating an even, glare-free glow across every surface.
How Can Smart Storage Solutions Maximize Every Square Inch?
Smart storage solutions transform unused kitchen voids into highly functional zones, directly reclaiming every square inch. Vertical pull-out pantry units exploit narrow gaps beside refrigerators, while corner carousels or magic corner systems eliminate dead space under countertops. Install deep drawer dividers for pots and lids, and use toe-kick drawers beneath lower cabinets for baking sheets—areas often ignored. Inside upper cabinets, dual-tier lazy Susans double accessible capacity, and under-sink caddies with hinged doors keep cleaning supplies reachable without wasted rear depth. For prep areas, a cutting board rack mounted on a cabinet door uses vertical surface instead of counter footprint. Consider custom drawer inserts for spice jars and utensils to keep every container nested, preventing chaotic stacking that reduces usable volume. Finally, ceiling-height cabinets with a fold-down step stool built into a toe-kick maximize overhead storage without sacrificing safety or convenience.

Pull-Out Pantries, Lazy Susans, and Deep Drawer Organizers
Pull-out pantries transform narrow gaps beside refrigerators or ranges into full-height, accessible food storage, eliminating the need to kneel or reach into dark voids. Lazy Susans maximize corner base cabinets by rotating stored items to the front, turning dead zones into practical shelving for pots, small appliances, or spices. Deep drawer organizers, fitted with adjustable dividers or cutlery inserts, capitalize on vertical space beneath countertops, holding bulky cookware and pantry goods in layered, visible layers. The true efficiency lies in matching each mechanism to the specific dimension and usage frequency of the zone it serves. Together, these systems reduce wasted motion and increase usable square footage without altering the kitchen’s footprint, making every cabinet a space-maximizing storage solution.
Pull-out pantries, lazy Susans, and deep drawer organizers convert forgotten corners and recesses into functional, high-density storage, boosting kitchen capacity through targeted movement and visibility.
Vertical Dividers for Trays, Cutting Boards, and Baking Sheets
Vertical dividers turn messy, sliding stacks of trays, cutting boards, and baking sheets into tidy, grab-and-go zones. Instead of digging through a cluttered cabinet, you can slot each flat item into its own designated channel, which also protects edges from chipping. Install them inside a base cabinet, drawer, or pantry shelf to use the often-wasted vertical space. For maximum efficiency, measure your tallest baking sheet first, then space dividers accordingly—this ensures nothing wedges or jams. Even a narrow 12-inch gap can hold eight sheets when organized top-to-bottom, not front-to-back. Choose sturdy metal or bamboo dividers that anchor firmly to prevent tipping when you pull a heavy pan. This simple upgrade is a space-saving kitchen organizer for flat cookware.
Q: Can vertical dividers work in a deep cabinet without wasting back space?
A: Absolutely—just mount them on a sliding drawer base or pull-out frame so you can access items in the back row without reaching past the front ones. This keeps every inch usable and your flatware visible at a glance.
Corner Cabinet Tricks That Turn Dead Space Into Usable Area
Corner cabinets often become dead zones, but targeted tricks transform them into high-functioning storage. A lazy Susan with tiered shelves delivers rotation for pots and pantry goods, maximizing depth that standard shelves waste. Alternatively, a swing-out “magic corner” system pulls fully forward, revealing every stored item without requiring you to crawl inside. For blind corners, install a pull-out wire basket on a telescopic slide, or use a diagonal cutout partition that rotates to access the deepest recess. Hinged “pop-up” racks mounted on the door also capture vertical space for spices and oils. Pairing these mechanisms with vertical dividers prevents stacked items from toppling, ensuring every inch of the awkward footprint becomes reachable and organized.
